Without doubt, 2016 is the year of VR (aka Virtual Reality). Movie studios like 20th Century Fox, Lionsgate, Disney, Marvel and Warner Bro. have already spent heavily to produce 360-degree VR movies. Some popular movies, such as Star Wars, The Hunger Games and The Martian, have been produced in VR mode and released online. Can't find your need VR videos or failed to play downladed VR videos on your immersive VR devices like PSVR? In this article, you are going to learn how to convert 2D/3D movie files to watch on PlayStation VR within a few clicks.  How to watch supported 2D/3D/VR videos on PS VR? Good News is that PS4 is updated with adding new update to the console's Media Player. If you have own PlayStatoin4 and a brand new, just launched PSVR headset, you are in good hands. You will be able to watch VR videos and enjoy an immersion with your favorite VR contents through the device. Activating VR Mode to View 360 Content Be sure to activate "VR Mode" from the Media Player's Option menu, and then select 360 clips of your choice from a connected server or USB device. Both video and still 360-degree content are supported, as long as they in MKV, AVI, MP4, MPEG2 PS, MPEG2 TS, AVCHD video formats, or JPEG, BMP, PNG image formats. However, each must be recorded in "equirectangular" format by a 360-degree camera in order for PS4 to recognize the file. Steps to watch VR content on PSVR 1. Purchase and download your standard 360 VR porn movies in mono (equirectangular) MP4 format. 2. Upload the 360 VR videos in a separate folder onto a USB drive. You video files MUST be in a folder in order for PS4 system to recognize. 3. Insert the USB drive containing the VR videos into your PS4. 4. Launch the Media Player App. 5. Select VR Mode in Option (PS4 restart may be necessary). 6. Put on the headset and enjoy! The best 2D/3D movie maker for PSVR As you can see, the supported video file formats for PS VR (PS4 Media Player) are very limited. If you have some videos in PSVR incompatible formats, for example, FLV, M2TS, WebM, VOB, MXF, Tivo, etc. how can you play them on PSVR? Take it easy. All you need to do is to change video format using a 3D video converter. Here Dimo Video Converter Ultimate is a top-notch PSVR video converter software app that capable of speedily ripping any Blu-rays in 2D/3D, stardard DVD and convert 2D/3D movie files to any type of 3D you want (Anaglyph, Top-Bottom, Side-by-Side) for VR headsets including Playstation VR, HTC Vive, Gear VR, VR One, Google Cardboard, etc. or 3D Players, 3D TV for watching amazing 3D movies. Besides, it also allows you to extract melodious soundtracks or special audios from 2D/3D movies for PlayStation VR audio experience with delivering high audio quality. With the support for NVIDIA CUDA technology, video conversion will be finished in a flash. Its built-in powerful video editor makes it easy to cut, trim, split, join, crop, resize, rotate, take video snapshots, add special effects/watermark. You are also allowed to adjust video/audio parameters, aspect ratio, resolution, frame rate, bit rate and more. The Mac version- Dimo Video Converter Ultimate for Mac is also to convert 2D/3D movies to PSVR on Mac (macOS Sierra included). Free Download Dimo Video Converter Ultimate (Win/Mac):
 Other Download:
Steps to convert unsupported 2D/3D movies to PSVR Step 1. Add Video Files Open this VR video converter for PSVR. You can directly use the "Add File" button to load the ordinary video that you wish to convert into PSVR format. Or it is also available to drag and drop video from PC folder into this program. Double click on the file and you can get a preview on the converter.
Other Download:
Steps to convert unsupported 2D/3D movies to PSVR Step 1. Add Video Files Open this VR video converter for PSVR. You can directly use the "Add File" button to load the ordinary video that you wish to convert into PSVR format. Or it is also available to drag and drop video from PC folder into this program. Double click on the file and you can get a preview on the converter.  Step 2. Select 3D SBS mode In order to make converted videos works perfectly with your PSVR, you need to set a video mode according to your video type. Click "Edit" and turn to "3D" tab and select Left/Right as the output video mode. Then you can turn to "Adjust" to crop and get the imported videos cropped as you want. If you encode the corrected aspect direct into your movie file you could plug your PS4 direct into the PlayStation VR for sbs 3D playback.
 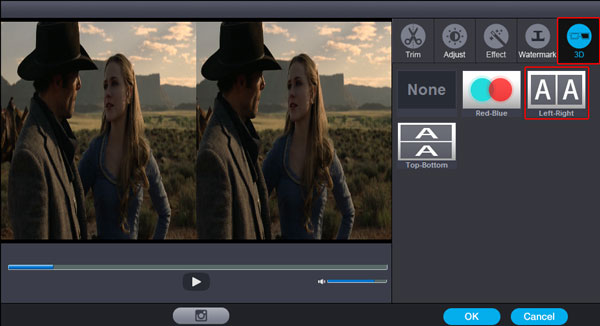 Step 3. Select PSVR as Output Format Click the "Select Format" bar and you can choose "VR -> PSVR" as the target format. This format can be played well on PSVR. Also you can select "Format -> Video -> MP4" as output audio format for enjoying. Step 4. Customize Video Settings Before starting the conversion, click the "Setting" icon on bottom right corner where you are able to adjust the video/audio settings like encoder, resolution, frame rate, bit rate and so on. Also it is possible to change output folder path as per your need by clicking "...".
  The newest kid on the block features a combined 1920 x 1080 display OLED resolution, with each eye seeing 960 x 1080. The screen also gets a 120Hz refresh rate and 100-degree field of view, which should translate to smooth visuals. Sony has also announced a 90Hz refresh rate option, for the PSVR, as well, which will allow developers to create games that aren't as hardware intensive. Step 5. Start to Convert Normal 2D/3D video to PSVR Click on "Start" button to accomplish the process of 2D/3D video to PSVR conversion. And this virtual reality video conversion will be finished in a short time. After the conversion, click the "Open" button to locate converted files, and then you can import the output .mp4 files into PlayStation VR for playing with the best quality including "look all around you" 3D vision and "hear things behind you" stereo sound. Step 6. Watch converted SBS video on PSVR
- Plug the PSVR HDMI cable directly to your PC(Mac), not the breakout box.
- In the HDMI OUT port of the PSVR breakout box, You have to plug a HDMI cable to a TV that is turned on. Could be bypassed by connecting something like Headless Ghost, (this will trick the PSVR breakout box into thinking a display is connected to it.)
- After that, you should see your PC screen on the PSVR headset, not in cinema mode but your entire screen covering the whole PSVR display, then you can use VLC or something to display a SBS 3D movie
Just make 3D movies for PSVR by yourself and leave the expensive 3D theater ticket away right now with faster conversion than ever before! The PlayStation VR connects to your PS4 via a special converter box. You plug the headset's HDMI and USB cables into the box, then the box into your PS4. A secondary HDMI port on the box lets you send the image to your TV, so you can wear the headset and still play your friend who doesn't have a headset of her own. Free Download or Purchase Dimo Video Converter Ultimate: 
 Need the lifetime version to work on 2-4 PCs so that your friends and family can instantly broaden their entertainment options? Please refer to the family license here.
  Kindly Note: The price of Dimo Video Converter Ultimate for Windows is divided into 1 Year Subscription, Lifetime/Family/Business License: $43.95/Year; $45.95/lifetime license; $95.95/family license(2-4 PCs); $189.95/business pack(5-8 PCs). Get your needed one at purchase page. Contact us or leave a message at Facebook if you have any issues. Related Articles:
Source: How can I Watch 3D or VR movies on PSVR
Kindly Note: The price of Dimo Video Converter Ultimate for Windows is divided into 1 Year Subscription, Lifetime/Family/Business License: $43.95/Year; $45.95/lifetime license; $95.95/family license(2-4 PCs); $189.95/business pack(5-8 PCs). Get your needed one at purchase page. Contact us or leave a message at Facebook if you have any issues. Related Articles:
Source: How can I Watch 3D or VR movies on PSVR
While you may get your movies and TV shows digitally, you probably still have a DVD collection. You can certain watch these DVDs the usual way, with a DVD player, but wouldn’t it be great to get the movies off of DVD discs and into your iTunes library, so you can sync them to your iPad or iPhone, and watch them anywhere? You will always want to have access to your DVDs whenever you feel like. Actually, your goal is easy to achieve. All you have to do is convert DVD to iTunes-compatible format with a DVD ripping tool. This article provides you with the detailed information for how to rip and import DVD to iTunes on Mac OS (macOS Sierra included).  Getting the software to rip DVD to iTunes There are many DVD ripping programs out there that allow you to make copies of your DVDs and let you watch them the way you want to view them. If you’re looking for ease of us and don’t mind spending $45.95, I’ve success using Dimo Video Converter Ultimate for Mac which you can use to remove the strict DVD protection and region restrictions and rip DVD movies to iTunes video very quickly while retaining great video quality. It’s an ideal app for you to copy DVD to iTunes(iTunes 12.6), iPad, iPod/iPod Touch, Apple TV, iPhone and more. Besides, it also can help you to convert DVD to almost any other common video format such as VOB, FLV, WMV, AVI, MKV or backup DVD keeping the whole movie structure as you need. The equivalent Windows version is DVD to iTunes Converter. Free Download Dimo Video Converter Ultimate for Mac/Win: Other Download:
Steps to Rip DVD to iTunes on Mac/Windows for syncing The process is straightforward. After downloading, follow the wizard to install and run the program. Then follow the steps below to rip and copy DVDs to iTunes in a few clicks! Step 1. Load DVD movies Insert the DVD disc to DVD-ROM and click the "Add DVD" button to have movies uploaded to the DVD Ripper. Here you can also import DVD folders and ISO files to convert.
Getting the software to rip DVD to iTunes There are many DVD ripping programs out there that allow you to make copies of your DVDs and let you watch them the way you want to view them. If you’re looking for ease of us and don’t mind spending $45.95, I’ve success using Dimo Video Converter Ultimate for Mac which you can use to remove the strict DVD protection and region restrictions and rip DVD movies to iTunes video very quickly while retaining great video quality. It’s an ideal app for you to copy DVD to iTunes(iTunes 12.6), iPad, iPod/iPod Touch, Apple TV, iPhone and more. Besides, it also can help you to convert DVD to almost any other common video format such as VOB, FLV, WMV, AVI, MKV or backup DVD keeping the whole movie structure as you need. The equivalent Windows version is DVD to iTunes Converter. Free Download Dimo Video Converter Ultimate for Mac/Win: Other Download:
Steps to Rip DVD to iTunes on Mac/Windows for syncing The process is straightforward. After downloading, follow the wizard to install and run the program. Then follow the steps below to rip and copy DVDs to iTunes in a few clicks! Step 1. Load DVD movies Insert the DVD disc to DVD-ROM and click the "Add DVD" button to have movies uploaded to the DVD Ripper. Here you can also import DVD folders and ISO files to convert. 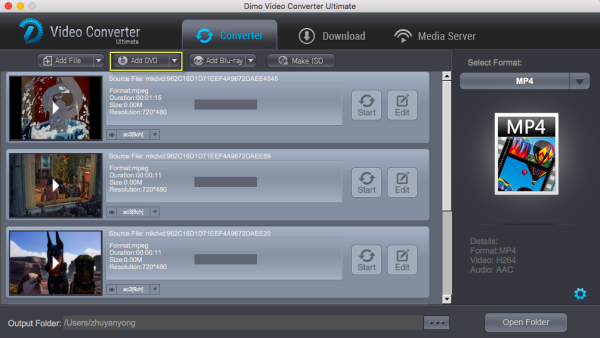 Step 2. Select iTunes format and ouput folder After you have successfully completed loading your DVD, select the output format and folder. If you do not have a ready folder, create one where you can easily locate it. The video formats available are M4V, MP4 or MOV. In this case, we shall select MP4 format from the "Format > Video" for description purposes. Tip: To select the audio track you like, simply choose preferred audio track from the Audio drop-down lists. Step 3. Start to rip After selecting your desired format and the destination file you can opt to make changes or settings and if you are OK with the way the format is click the "Start" button to initiate the DVD to iTunes conversion. This might take some time; however, it is important to note that the conversion time depends on the size of the DVD movies. When the conversion is done, you can decide to edit your movie, watch it or share it with friends on iTunes or iPod Touch, iPad, iPhone, among other portable devices. Ways to import and play the converted DVD videos with iTunes Once you ascertain that the conversion is successfully completed, you can import the file anywhere you wish to even in the media player as long as the file is iTunes friendly. First, locate the output file where you have saved the videos. Then open the iTunes app so that you can import the output videos to it. This can be done by dragging and dropping the media file. The process is simple all you need is: Step 1. Click "File" menu on the left side of iTunes toolbar Step 2. Choose the "Add File to Library" option Step 3. Open the output folder that contains the videos Step 4. Select the file and click "Open". After opening the file the will go to your iTunes and you can verify if the transfer has been successful by going to the iTunes library and typing the name of the file. If it is successfully transferred, A thumbnail of the video file will appear in your screen. If the transfer is successful you can further transfer the file to your iPod Touch, iPad Air 2, iPad Pro, iPad Mini 4, iPad (2017), iPhone 7 Plus, iPhone 7, Apple TV 4/3 and other portable devices and you can easily enjoy them everywhere you wish to. NOTE: Also you can use the build-in media server in Dimo Video Converter Ultimate for Mac, which let you directly transfer any type of digital video & audio formats to your device based on the advanced IP address sharing technology, just keeping your computer and apple devices in the same network, it will automatically move the converted DVD to your target device no matter how huge file you have by "ONE-Click" to get rip of the tremendous iTunes transmitting work. Free Download or Purchase Dimo Video Converter Ultimate for Mac/Win:
 Need the lifetime version to work on 2-4 Macs so that your friends and family can instantly broaden their entertainment options? Please refer to the family license here. Kindly Note: The price of Dimo Video Converter Ultimate for Mac is divided into 1 Year Subscription, Lifetime/Family/Business License: $43.95/Year; $45.95/lifetime license; $95.95/family license(2-4 Macs); $189.95/business pack(5-8 Macs). Get your needed one at purchase page. Related Software: BDmate (Mac/Win) Lossless backup Blu-ray to MKV with all audio and subtitle tracks; Rip Blu-ray to multi-track MP4; Convert Blu-ray to almost all popular video/audio formats and devices; Copy Blu-ray to ISO/M2TS; Share digitized Blu-ray wirelessly. DVDmate (Mac/Win) A professional DVD ripping and editing tool with strong ability to remove DVD protection, transcode DVD to any video and audio format, and edit DVD to create personal movie. Videomate (Mac/Win) An all-around video converter software program that enables you to convert various video and audio files to formats that are supported by most multimedia devices. 8K Player (Mac/Win) Contact us or leave a message at Facebook if you have any issues. Related Articles:
Source: How to rip DVD for adding to iTunes library
Need the lifetime version to work on 2-4 Macs so that your friends and family can instantly broaden their entertainment options? Please refer to the family license here. Kindly Note: The price of Dimo Video Converter Ultimate for Mac is divided into 1 Year Subscription, Lifetime/Family/Business License: $43.95/Year; $45.95/lifetime license; $95.95/family license(2-4 Macs); $189.95/business pack(5-8 Macs). Get your needed one at purchase page. Related Software: BDmate (Mac/Win) Lossless backup Blu-ray to MKV with all audio and subtitle tracks; Rip Blu-ray to multi-track MP4; Convert Blu-ray to almost all popular video/audio formats and devices; Copy Blu-ray to ISO/M2TS; Share digitized Blu-ray wirelessly. DVDmate (Mac/Win) A professional DVD ripping and editing tool with strong ability to remove DVD protection, transcode DVD to any video and audio format, and edit DVD to create personal movie. Videomate (Mac/Win) An all-around video converter software program that enables you to convert various video and audio files to formats that are supported by most multimedia devices. 8K Player (Mac/Win) Contact us or leave a message at Facebook if you have any issues. Related Articles:
Source: How to rip DVD for adding to iTunes library
A smart LG TV is a big entertainment in our daily life. Nowadays it is convenient to put movies on USB flash drive and play on a LG LED, LCD, 3D or Ultra HD 4K TV via USB port. If you have lots of 3D AVI files and a LG TV, chances are you want to watch the 3D AVI files on LG TV.  When you try to do this, you'll find it's very difficult to do the job. Well, can LG TV play 3D AVI files with 3D effect? Here is my answer. AVI is not one of the LG TV supported formats. Luckily, this problem is easy to solve: all you have to do is convert the AVI videos to LG TV compatible MP4 files using a third-party program. Once yo have, you can add them to your USB flash drive and use them like any other file LG TV supports. There are many programs out there that allow us to transcode 3D AVI files to LG TV friendly formats. If you are seeking for the best video output quality, fastest video conversion speed, and the most formats supported, Dimo Video Converter Ultimate will be your best choice. It's a professional yet easy-to-use app which can help us convert AVI to LG TV accepted MP4 videos without any quality loss. In addition, it not only supports AVI videos, but also handles various common video formats, like MXF, MTS, MKV, MP4, VOB, M0V, FLV, MPG, WMV .etc. Besides, it offers different 3D mode like Red-Blue, Left-Right, Top-Bottom for 3D players, 3D TVs, VR headsets,etc. What's more, it offers kinds of preset profiles for LG/Samsung/Panasonic/Sony TV, Apple TV, iPhone, iPad, VR, Xbox, Playstation, Samsung tablet/phone, etc to meet your different needs. If you're using a Mac, simply turn to the Mac version, which has the same function with the Windows version. Here is how to do it. Free Download Dimo Video Converter Ultimate (Win/Mac): Other Download:
Steps to convert 3D AVI to LG TV compatible format Step 1: Start the 3D AVI to LG TV converter and drag .avi files to the software interface to import the file.
When you try to do this, you'll find it's very difficult to do the job. Well, can LG TV play 3D AVI files with 3D effect? Here is my answer. AVI is not one of the LG TV supported formats. Luckily, this problem is easy to solve: all you have to do is convert the AVI videos to LG TV compatible MP4 files using a third-party program. Once yo have, you can add them to your USB flash drive and use them like any other file LG TV supports. There are many programs out there that allow us to transcode 3D AVI files to LG TV friendly formats. If you are seeking for the best video output quality, fastest video conversion speed, and the most formats supported, Dimo Video Converter Ultimate will be your best choice. It's a professional yet easy-to-use app which can help us convert AVI to LG TV accepted MP4 videos without any quality loss. In addition, it not only supports AVI videos, but also handles various common video formats, like MXF, MTS, MKV, MP4, VOB, M0V, FLV, MPG, WMV .etc. Besides, it offers different 3D mode like Red-Blue, Left-Right, Top-Bottom for 3D players, 3D TVs, VR headsets,etc. What's more, it offers kinds of preset profiles for LG/Samsung/Panasonic/Sony TV, Apple TV, iPhone, iPad, VR, Xbox, Playstation, Samsung tablet/phone, etc to meet your different needs. If you're using a Mac, simply turn to the Mac version, which has the same function with the Windows version. Here is how to do it. Free Download Dimo Video Converter Ultimate (Win/Mac): Other Download:
Steps to convert 3D AVI to LG TV compatible format Step 1: Start the 3D AVI to LG TV converter and drag .avi files to the software interface to import the file. 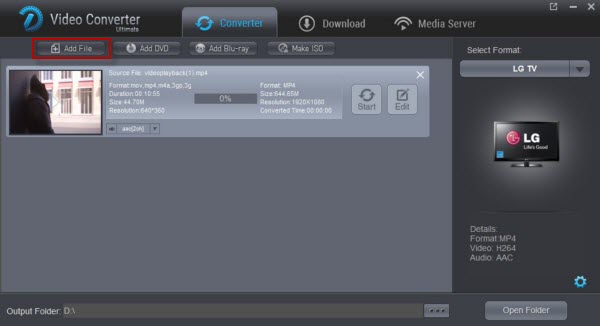 Step 2: Set output video format as H.264 MP4 under Select Format > TV. It offers kinds of preset profiles for LG TV and other TV models like SUMSUNG, BRAVIA and Panasonic TV. Tip: Before start the 3D AVI conversion for LG Smart TV, you can click the Settings icon and adjust the video bitrate, codec, frame rate, audio sample rate, etc parameters.
 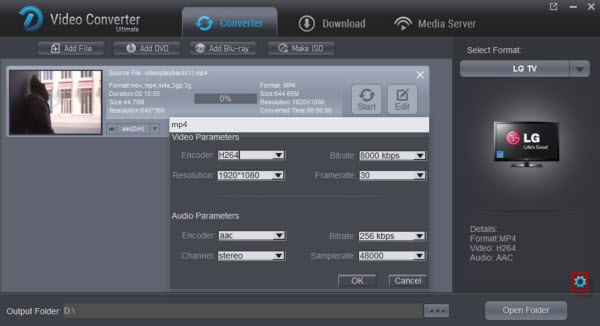 Step 3: Set 3D effect retained in output If you wanna get 3D effect with the output videos, click "Edit". In the editor opened, turn to "3D" tab and choose 3D effect (Red-Blue, Left-Right, Top-Bottom three modes) from the option. The supported editing functions also include cropping frame size, trimming the length, adding watermark, adding special effect and so on. Step 4: Hit the Start; this video converter will start to convert 3D AVI to mp4 for playback on LG TV through USB drive in no time. After the conversion is over, connect the USB drive with computer and head to the destination folder where the converted files are stored, transfer the files to the USB drive then plug the drive in the LG TV. Or use Dimo's free media server to share converted files to LG TV for watching. Enjoy. Free Download or Purchase Dimo Video Converter Ultimate: Need the lifetime version to work on 2-4 PCs so that your friends and family can instantly broaden their entertainment options? Please refer to the family license here. Kindly Note: The price of Dimo Video Converter Ultimate for Windows is divided into 1 Year Subscription, Lifetime/Family/Business License: $43.95/Year; $45.95/lifetime license; $95.95/family license(2-4 PCs); $189.95/business pack(5-8 PCs). Get your needed one at purchase page. Related Software: BDmate (Win/Mac) Lossless backup Blu-ray to MKV with all audio and subtitle tracks; Rip Blu-ray to multi-track MP4; ConvertBlu-ray to almost all popular video/audio formats and devices; Copy Blu-ray to ISO/M2TS; Share digitized Blu-ray wirelessly. DVDmate (Win/Mac) A professional DVD ripping and editing tool with strong ability to remove DVD protection, transcode DVD to any video and audio format, and edit DVD to create personal movie. Videomate (Win/Mac) An all-around video converter software program that enables you to convert various video and audio files to formats that are supported by most multimedia devices. 8K Player (Win/Mac) A mixture of free HD/4K video player, music player, Blu-ray/DVD player, video recorder and gif maker. Related Articles:
Source: How to Play 3D AVI on LG TV A Quick Fix
Step 3: Set 3D effect retained in output If you wanna get 3D effect with the output videos, click "Edit". In the editor opened, turn to "3D" tab and choose 3D effect (Red-Blue, Left-Right, Top-Bottom three modes) from the option. The supported editing functions also include cropping frame size, trimming the length, adding watermark, adding special effect and so on. Step 4: Hit the Start; this video converter will start to convert 3D AVI to mp4 for playback on LG TV through USB drive in no time. After the conversion is over, connect the USB drive with computer and head to the destination folder where the converted files are stored, transfer the files to the USB drive then plug the drive in the LG TV. Or use Dimo's free media server to share converted files to LG TV for watching. Enjoy. Free Download or Purchase Dimo Video Converter Ultimate: Need the lifetime version to work on 2-4 PCs so that your friends and family can instantly broaden their entertainment options? Please refer to the family license here. Kindly Note: The price of Dimo Video Converter Ultimate for Windows is divided into 1 Year Subscription, Lifetime/Family/Business License: $43.95/Year; $45.95/lifetime license; $95.95/family license(2-4 PCs); $189.95/business pack(5-8 PCs). Get your needed one at purchase page. Related Software: BDmate (Win/Mac) Lossless backup Blu-ray to MKV with all audio and subtitle tracks; Rip Blu-ray to multi-track MP4; ConvertBlu-ray to almost all popular video/audio formats and devices; Copy Blu-ray to ISO/M2TS; Share digitized Blu-ray wirelessly. DVDmate (Win/Mac) A professional DVD ripping and editing tool with strong ability to remove DVD protection, transcode DVD to any video and audio format, and edit DVD to create personal movie. Videomate (Win/Mac) An all-around video converter software program that enables you to convert various video and audio files to formats that are supported by most multimedia devices. 8K Player (Win/Mac) A mixture of free HD/4K video player, music player, Blu-ray/DVD player, video recorder and gif maker. Related Articles:
Source: How to Play 3D AVI on LG TV A Quick Fix
Of the various virtual reality headsets that have emerged this year, HTC Vive is the one that's most delivered on the lofty promises of VR. It's designed to put your entire body into a digital realm. Once you find some good sources of VR videos, or have regular 3D movies like Avatar, Guardians of the Galaxy, Zootopia, Captain America: Civil War, X-Men: Apocalypse, Star Trek Beyond, Ice Age: Collision Course, or stuff like that, you can start watching these 3D movies on HTC Vive and putting yourself into a virtual world. 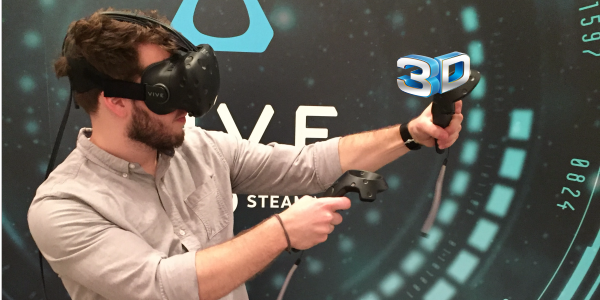 Full HTC Vive 3D Movie HOWTO Guide Preparation: 1. Best HTC Vive Video Converter- Watch 3D videos on HTC Vive Watching VR video on HTC Vive is a good taster of Virtual Reality within budget. Can any 3D video be viewed on HTC Vive? No. But with HTC Vive Video Converter -Dimo Video Converter Ultimate, you can watch any 3D movies on HTC Vive without error. With it, you are able convert unsupported 3D movies including 3D Blu-ray to SBS 3D MP4 files for playback on your HTC Vive in just few clicks. It has the most amazingly easy to operate interface. Even freshers, who have no information on how to convert 3D movies, can quickly finish the 3D video conversion by following the guide. It supports not only HTC Vive, but also all VR headsets like Gear VR, VR One, Rift DK2, Google Cardboard, etc. and mainstream 3D TV, 3D media players! By the way, thanks to its advanced NVIDIA CUDA technology, you'll going to process your conversion at 6X faster speed while retaining excellent output quality. If you are a Mac user, you can turn to Dimo Video Converter Ultimate for Mac (OS Sierra, El Capitan included), which has the same function as the Windows version. Free Download Dimo Video Converter Ultimate (Win/Mac): Other Download:
2. Buy/Download a 3D movie that is in these formats: .mp4 .m4v .3gp .3g2 .ts .webm .mkv .wmv .asf .avi .flv. In my opinion, .mp4 is best, while audio is aac. 3. A VR player app a. Whirligig To watch a video, click the Browse button in the top left-hand corner of the menu. You'll be able to browse your hard drive to choose a video file. (Whirligig also claims to support YouTube links in its Settings, but I couldn't get that to work at the time of this writing.)
Full HTC Vive 3D Movie HOWTO Guide Preparation: 1. Best HTC Vive Video Converter- Watch 3D videos on HTC Vive Watching VR video on HTC Vive is a good taster of Virtual Reality within budget. Can any 3D video be viewed on HTC Vive? No. But with HTC Vive Video Converter -Dimo Video Converter Ultimate, you can watch any 3D movies on HTC Vive without error. With it, you are able convert unsupported 3D movies including 3D Blu-ray to SBS 3D MP4 files for playback on your HTC Vive in just few clicks. It has the most amazingly easy to operate interface. Even freshers, who have no information on how to convert 3D movies, can quickly finish the 3D video conversion by following the guide. It supports not only HTC Vive, but also all VR headsets like Gear VR, VR One, Rift DK2, Google Cardboard, etc. and mainstream 3D TV, 3D media players! By the way, thanks to its advanced NVIDIA CUDA technology, you'll going to process your conversion at 6X faster speed while retaining excellent output quality. If you are a Mac user, you can turn to Dimo Video Converter Ultimate for Mac (OS Sierra, El Capitan included), which has the same function as the Windows version. Free Download Dimo Video Converter Ultimate (Win/Mac): Other Download:
2. Buy/Download a 3D movie that is in these formats: .mp4 .m4v .3gp .3g2 .ts .webm .mkv .wmv .asf .avi .flv. In my opinion, .mp4 is best, while audio is aac. 3. A VR player app a. Whirligig To watch a video, click the Browse button in the top left-hand corner of the menu. You'll be able to browse your hard drive to choose a video file. (Whirligig also claims to support YouTube links in its Settings, but I couldn't get that to work at the time of this writing.)  As the video starts to play, you'll probably want to adjust some settings using Whirligig's heads-up controls. Here's what we recommend for each type of video:
- Regular 2D video: Set Projector to Cinema or Cinema Curved.
- 3D video: 3D video comes in a few different forms, so check the video you downloaded–or the settings you used when you ripped it–to see whether it's Half Side-By-Side, Full Side-By-Side, Half Over-Under, or Full Over-Under. Set the Projector to either Cinema or Cinema Curved, then select SBS or OU instead of Mono. If the video is Half SBS, set Stretch to "100" so it displays in the proper aspect ratio.
- 180 or 360 degree video: The video will usually tell you whether it's 180 degrees or 360 degrees on the site you download it from. If it's 180 degrees, set Projector to "Fisheye" and set FOV to 180. If it's 360, set Projector to "Barrel" and FOV to 360. You may also have to tweak "Tilt" for 180 videos or "Rotation" for 360 videos so that the video is facing the right direction.
- Full VR video: Combine the correct settings from "3D video" and "180 or 360 degree video" sections of this list. You can also adjust the Scale and Distance settings to fit your tastes, or click the Settings cog in the lower right-hand corner for even more options. Whirligig also has some other cool features like saving different presets, but these basics should get you up and running pretty quickly. For now, sit back and enjoy the movie!
b. Virtual Desktop Whirligig isn't the only way to watch videos on your VR headset, but it was the best cost-to-performance ratio in our tests. If you're willing to pay a little more, Virtual Desktop ($15) is also pretty good, and can do a lot more than play videos–it is, as the name implies, a full version of your PC's desktop in virtual reality. Just play a video in your favorite desktop player (like VLC), set it to full-screen, and go. Download and Install Virtual Desktop First, download and install the Virtual Desktop from Steam. The cost is $14.99, but well worth it. If your target price is, well, free, then you can download the free GoPro VR player from Kolor. However, you need to start and stop the videos on your desktop monitor and is not entirely VR integrated. Setup Virtual Desktop The first thing to do is determine how BIG you want your desktop. The app lets you fully customize the size of the desktop. You can even specify with a simple slider control all the way up to 360 degrees which wrap the entire desktop around you. Although neat, 360 degrees is not too practical. Personally, I like 180 degrees with a screen distance around 3 meters. Playing 360/SBS Videos Now you have the virtual desktop installed and setup, playing 360 videos is easy! Just click the 360 Videos option (top right), then browse to your video. Depending on the video format, you will need to change the Video mode. If you see the image duplicated on the left and the right, then select Side By Side (SBS). If you're unsure which format you need, then just click the option until the video looks good. Very few videos these days are 180 degrees, most are 360 degrees in the video projection option. Steps to convert unsupported 3D videos to play on HTC Vive Step 1. Load your 3D movies Launch the video converter for HTC Vive, and click "Add file" button to import your source 3D materials. Or insert the Blu-ray disc to the Blu-ray Disc drive and click the "Add Blu-ray" button to have movies uploaded to the Blu-ray Ripper. 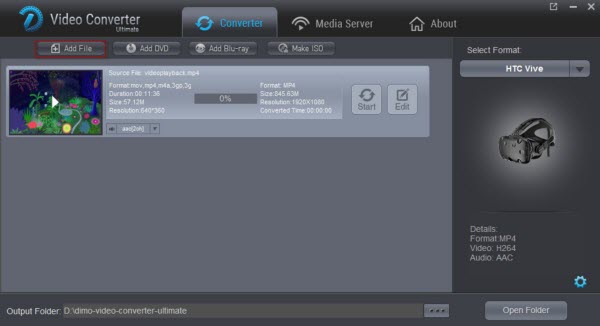 Step 2. Select output format Click "Format" and select "MP4" from "Format > Video" category as the output format. It works on HTC Vive perfectly. Tip: Click Settings to adjust the parameters like video codec, video bitrate, video frame rate, audio sample rate, audio channel. 1920x1080 compressed side-by-side 3D should be resampled to 1920x540 resolution full side-by-side resolution. And keep audio in AAC or MP3. Step 3. Select 3D mode Once you have gained proper information about video types then it is time to set a mode as per your video type so that it can work perfectly on your VR headset. The selection can be done as below: To get a SBS (Side-by-side) video, click "Edit", turn to "3D" and choose "Left/Right" mode. Finally hit OK button. Step 4. Start conversion Click the "Start" button to start and finish the 3D video to HTC Vive conversion. After the conversion, click "Open" button to quickly locate the generated media file. Now you can transfer the converted 3D videos to play with HTC Vive using the above methods easily. Free Download or Purchase Dimo Video Converter Ultimate: Need the lifetime version to work on 2-4 PCs so that your friends and family can instantly broaden their entertainment options? Please refer to the family license here. Kindly Note: The price of Dimo Video Converter Ultimate for Windows is divided into 1 Year Subscription, Lifetime/Family/Business License: $43.95/Year; $45.95/lifetime license; $95.95/family license(2-4 PCs); $189.95/business pack(5-8 PCs). Get your needed one at purchase page. Contact us or leave a message at Facebook if you have any issues. Related Articles:
Source: Watch any 3D movies and videos on HTC Vive
Step 2. Select output format Click "Format" and select "MP4" from "Format > Video" category as the output format. It works on HTC Vive perfectly. Tip: Click Settings to adjust the parameters like video codec, video bitrate, video frame rate, audio sample rate, audio channel. 1920x1080 compressed side-by-side 3D should be resampled to 1920x540 resolution full side-by-side resolution. And keep audio in AAC or MP3. Step 3. Select 3D mode Once you have gained proper information about video types then it is time to set a mode as per your video type so that it can work perfectly on your VR headset. The selection can be done as below: To get a SBS (Side-by-side) video, click "Edit", turn to "3D" and choose "Left/Right" mode. Finally hit OK button. Step 4. Start conversion Click the "Start" button to start and finish the 3D video to HTC Vive conversion. After the conversion, click "Open" button to quickly locate the generated media file. Now you can transfer the converted 3D videos to play with HTC Vive using the above methods easily. Free Download or Purchase Dimo Video Converter Ultimate: Need the lifetime version to work on 2-4 PCs so that your friends and family can instantly broaden their entertainment options? Please refer to the family license here. Kindly Note: The price of Dimo Video Converter Ultimate for Windows is divided into 1 Year Subscription, Lifetime/Family/Business License: $43.95/Year; $45.95/lifetime license; $95.95/family license(2-4 PCs); $189.95/business pack(5-8 PCs). Get your needed one at purchase page. Contact us or leave a message at Facebook if you have any issues. Related Articles:
Source: Watch any 3D movies and videos on HTC Vive